Click anywhere to close
A couple weeks ago, while I was sitting at a somewhat boring party waiting to get back to the woman I love, I realized I actually have no clue how the lightgun from the NES worked. So, as I do, I began wildly speculating about it until finally giving in and looking it up (by then I had already made it back home to her, and seeing as she loves knowing how things work almost as much as I do, we absolutely had to dig in)
There are plenty of great resources online about how the gun works, this youtube video in particular, but honestly just watching or reading about the gun just can’t do it justice. This thing was made in an age where digital electronics were brand new to the home. For a lot of families the NES was the first computer they ever bought. Sure if something like the light gun was built today you wouldn’t bat an eye but for it’s time it was truly an incredible feat of engineering. In my opinion the light gun represents engineering that even John Carmack would call an impressive feat of optimization. Anyways, this thing is cool, and there’s only one thing to do when you think a piece of hardware is cool. You buy one and take it apart :)
Quickly, because I need it later in this article and I would never want to suppose my reader of any prior knowledge on such an arcane topic, I will explain how the light gun works.
The light gun’s primary component is a photodiode at the end of a long tube. A photodiode will allow more electricity to pass through (more current) when more light is shone into it. When the trigger on the gun is pulled, the video game will do two things. First it will make your television screen entirely black for a frame (fig 2) (or more, idk how many frames). Second it will make your television screen entirely black EXCEPT for a white square on any interesting target on the screen (fig 3). By comparing the amount of current passing through the photodiode before and after the white square, your NES can decide if you were pointing the light gun at the target.
Hopefully that makes sense. This explanation has only been battle hardened in the brain of one rather brilliant other person, so I don’t know if it has any additional holes in it. Email me a question if you have one, I’ll update this post and send you a small gift of my choosing.
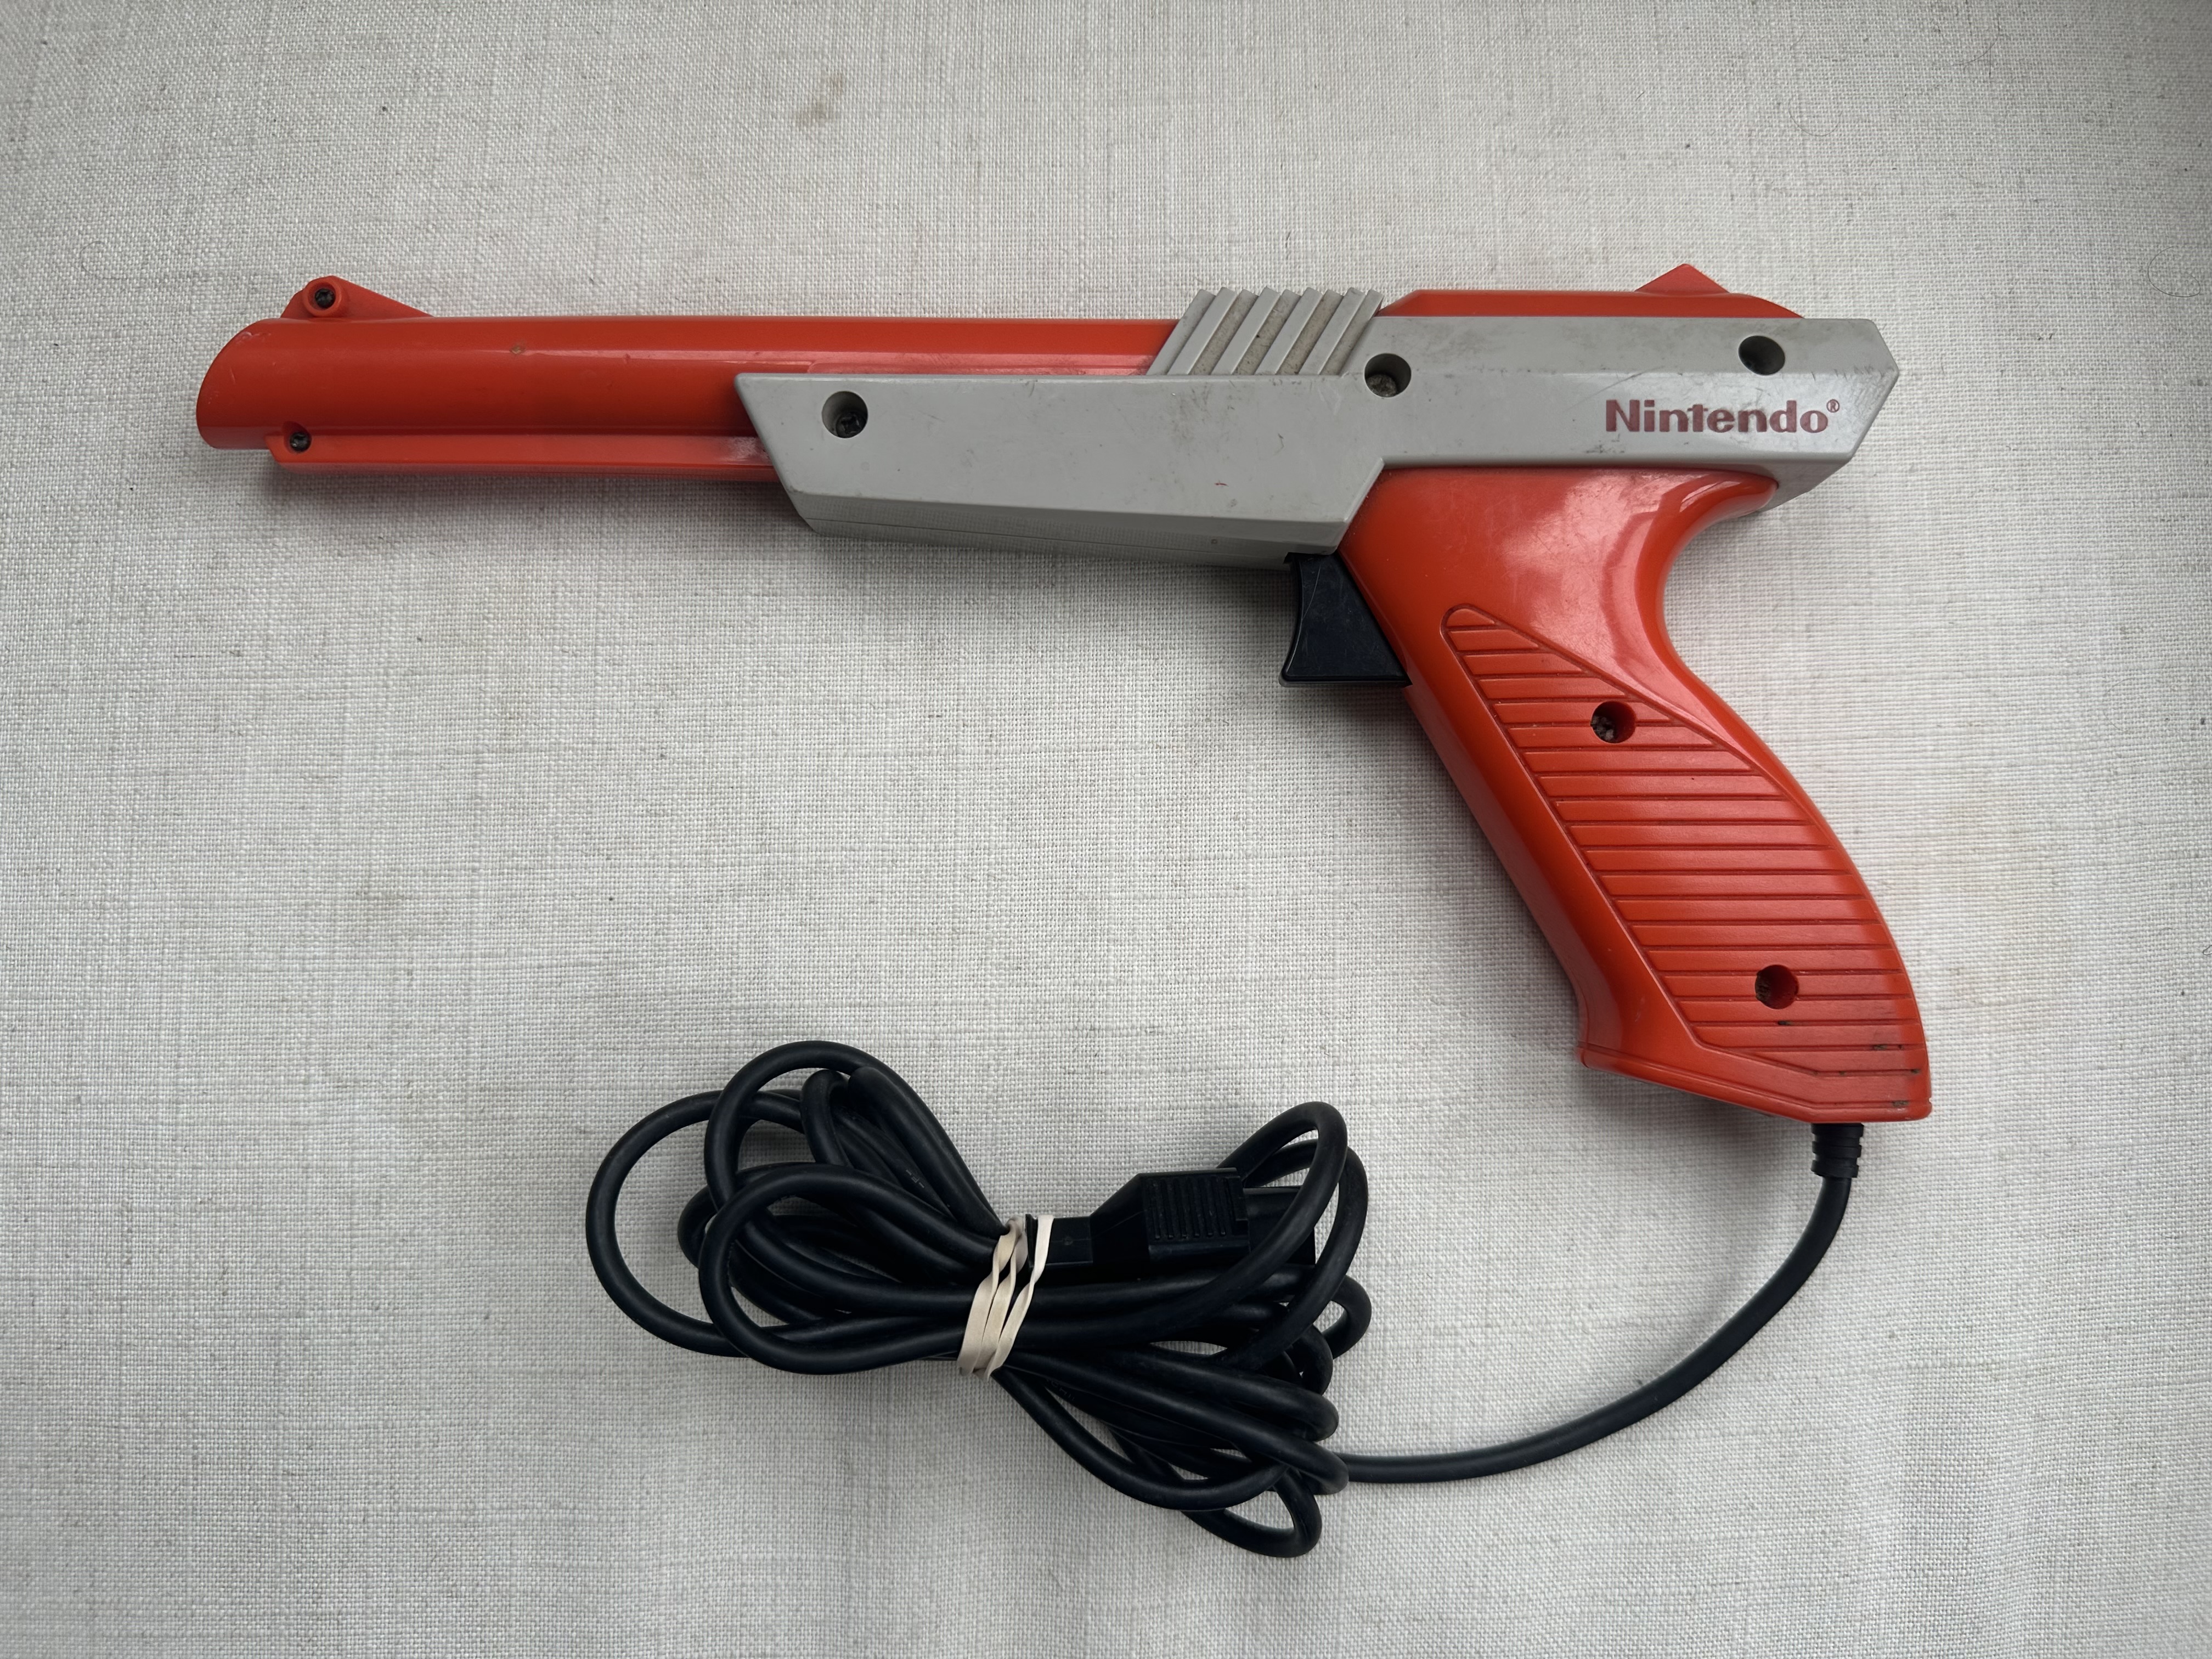
Okay now let’s get to the good stuff. I bought one on ebay for $20, and it came in days not weeks so by the time it got here I hadn’t quite forgotten about how cool these things are.
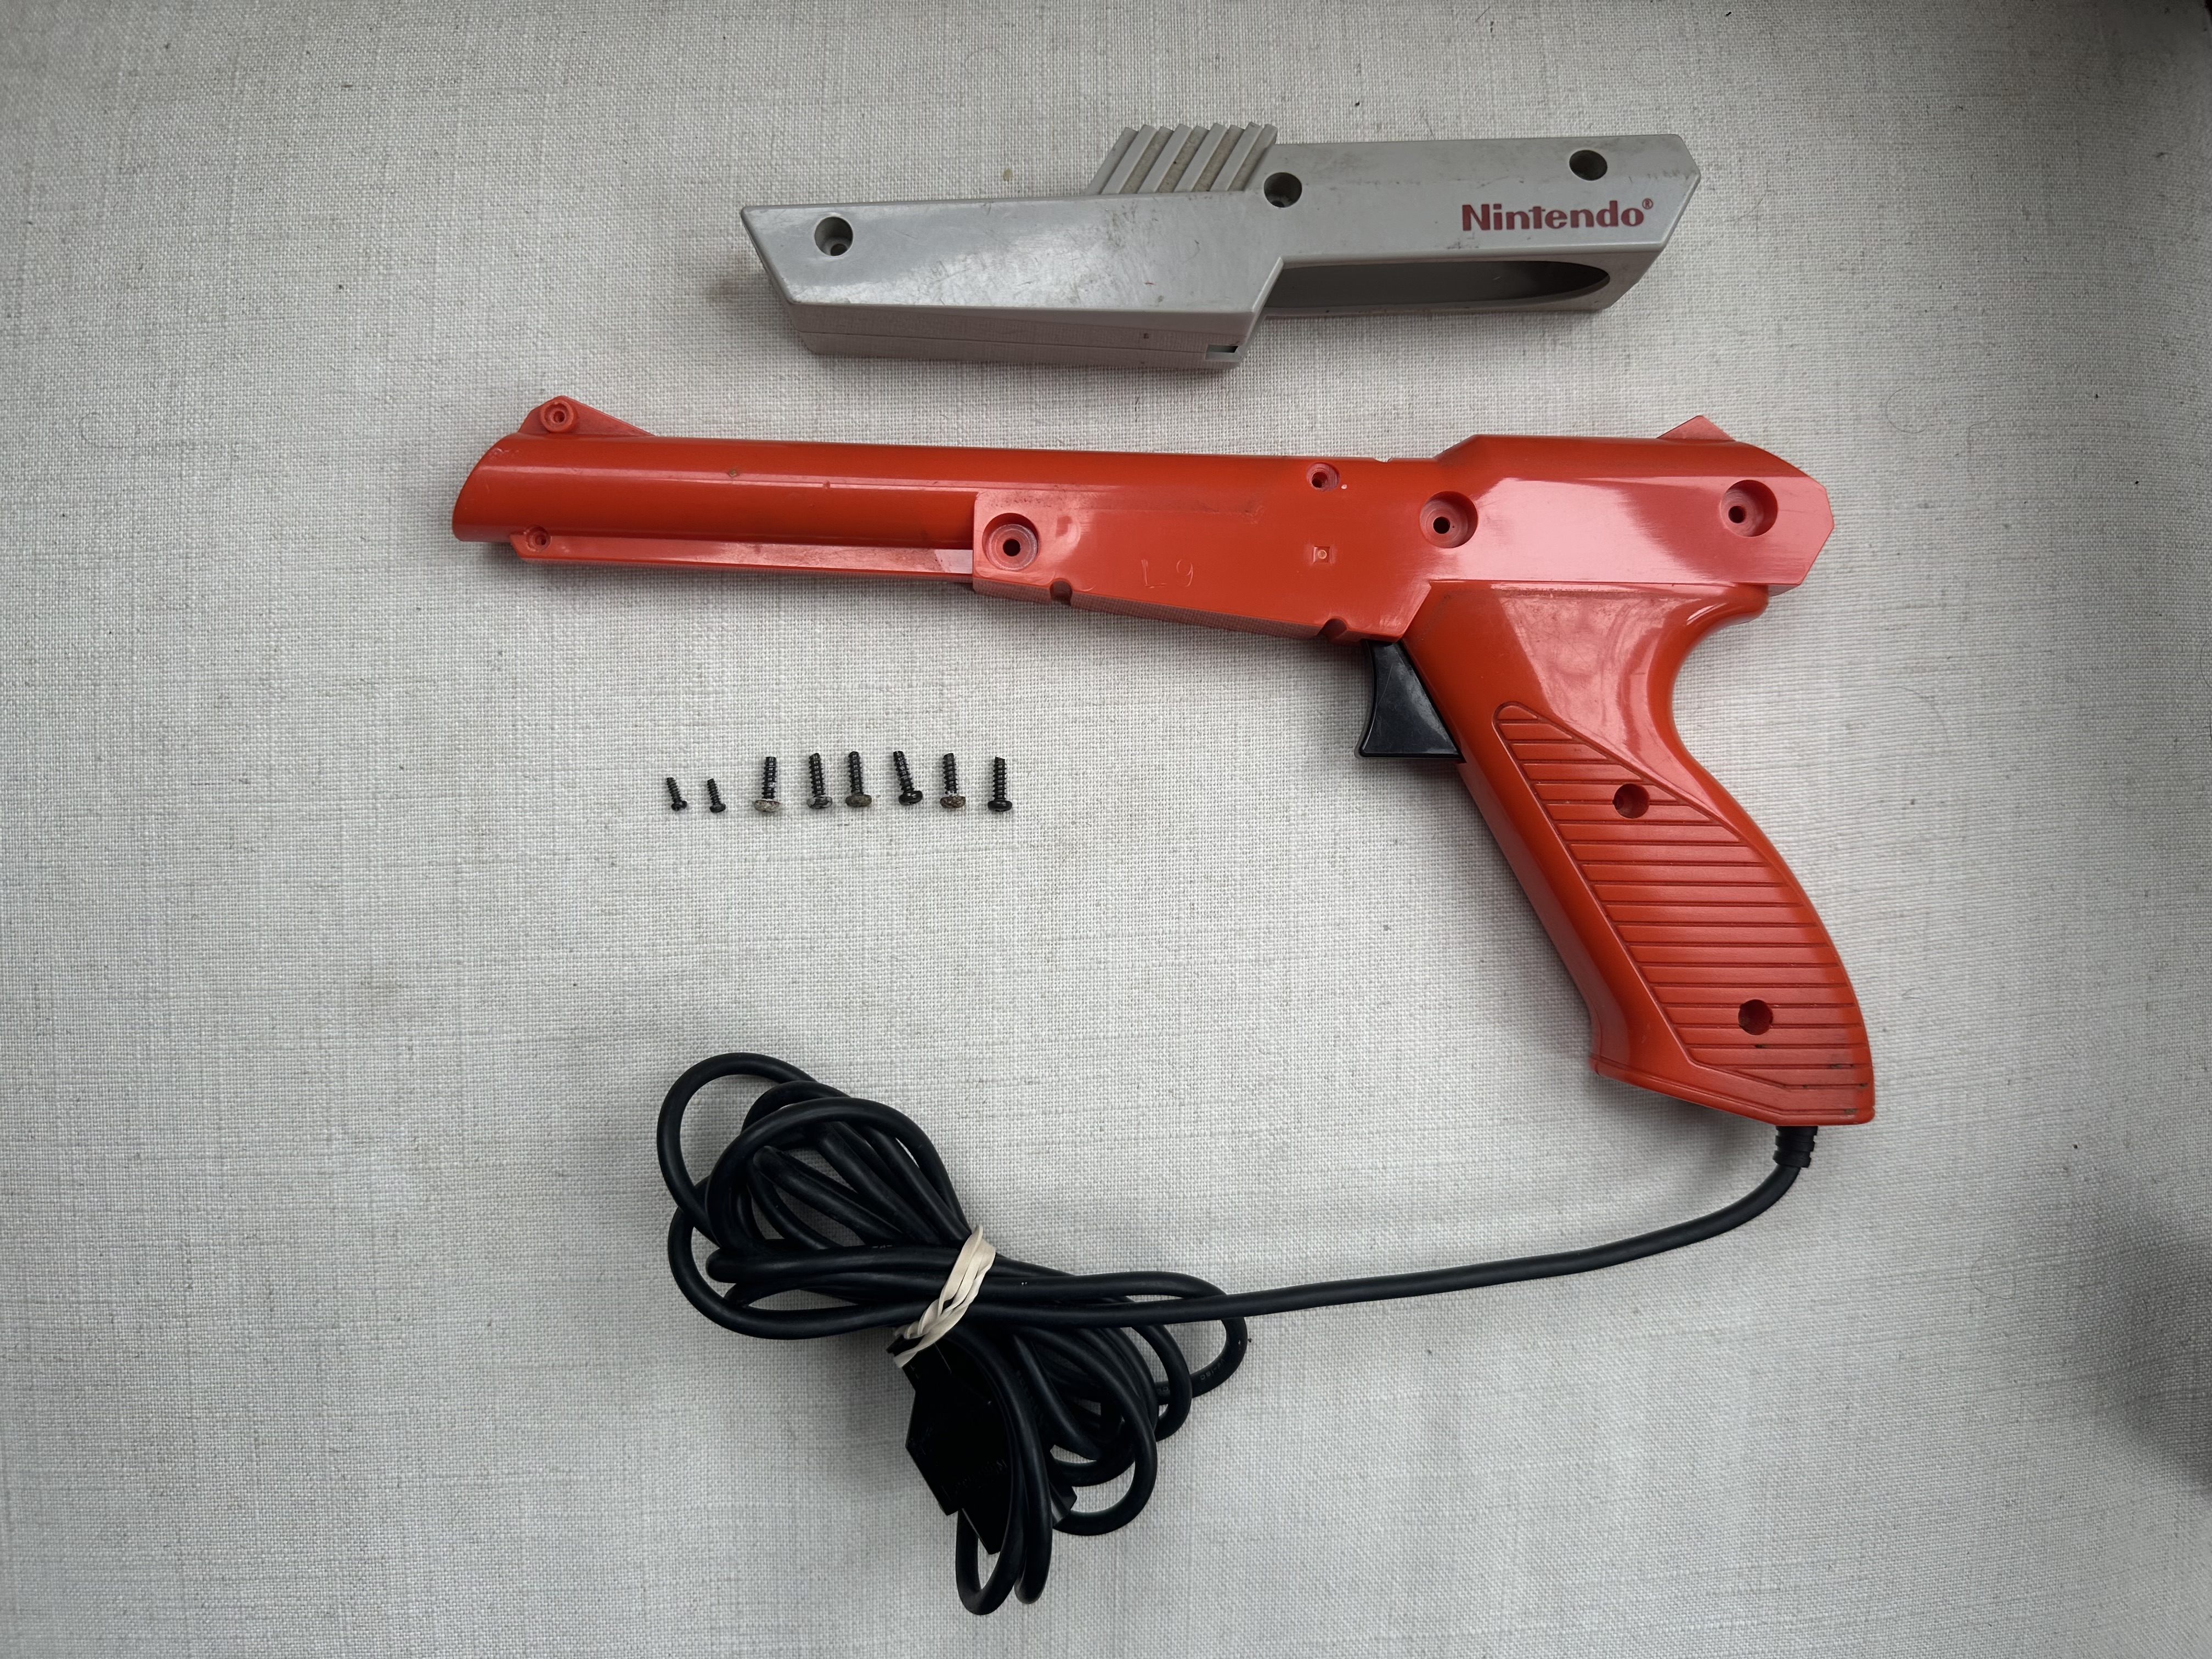
Getting the thing open was very easy. Thankfully these old consumer products don’t use any of the terribly annoying modern tricks to keep these plastic devices sealed. Only a few screws of various sizes, and I’m into the guts of this thing. Just as an aside, I find it mildly amusing that the grey plastic piece is purely a cosmetic feature, I wonder how much the ID team had to fight to get it added to the BOM.

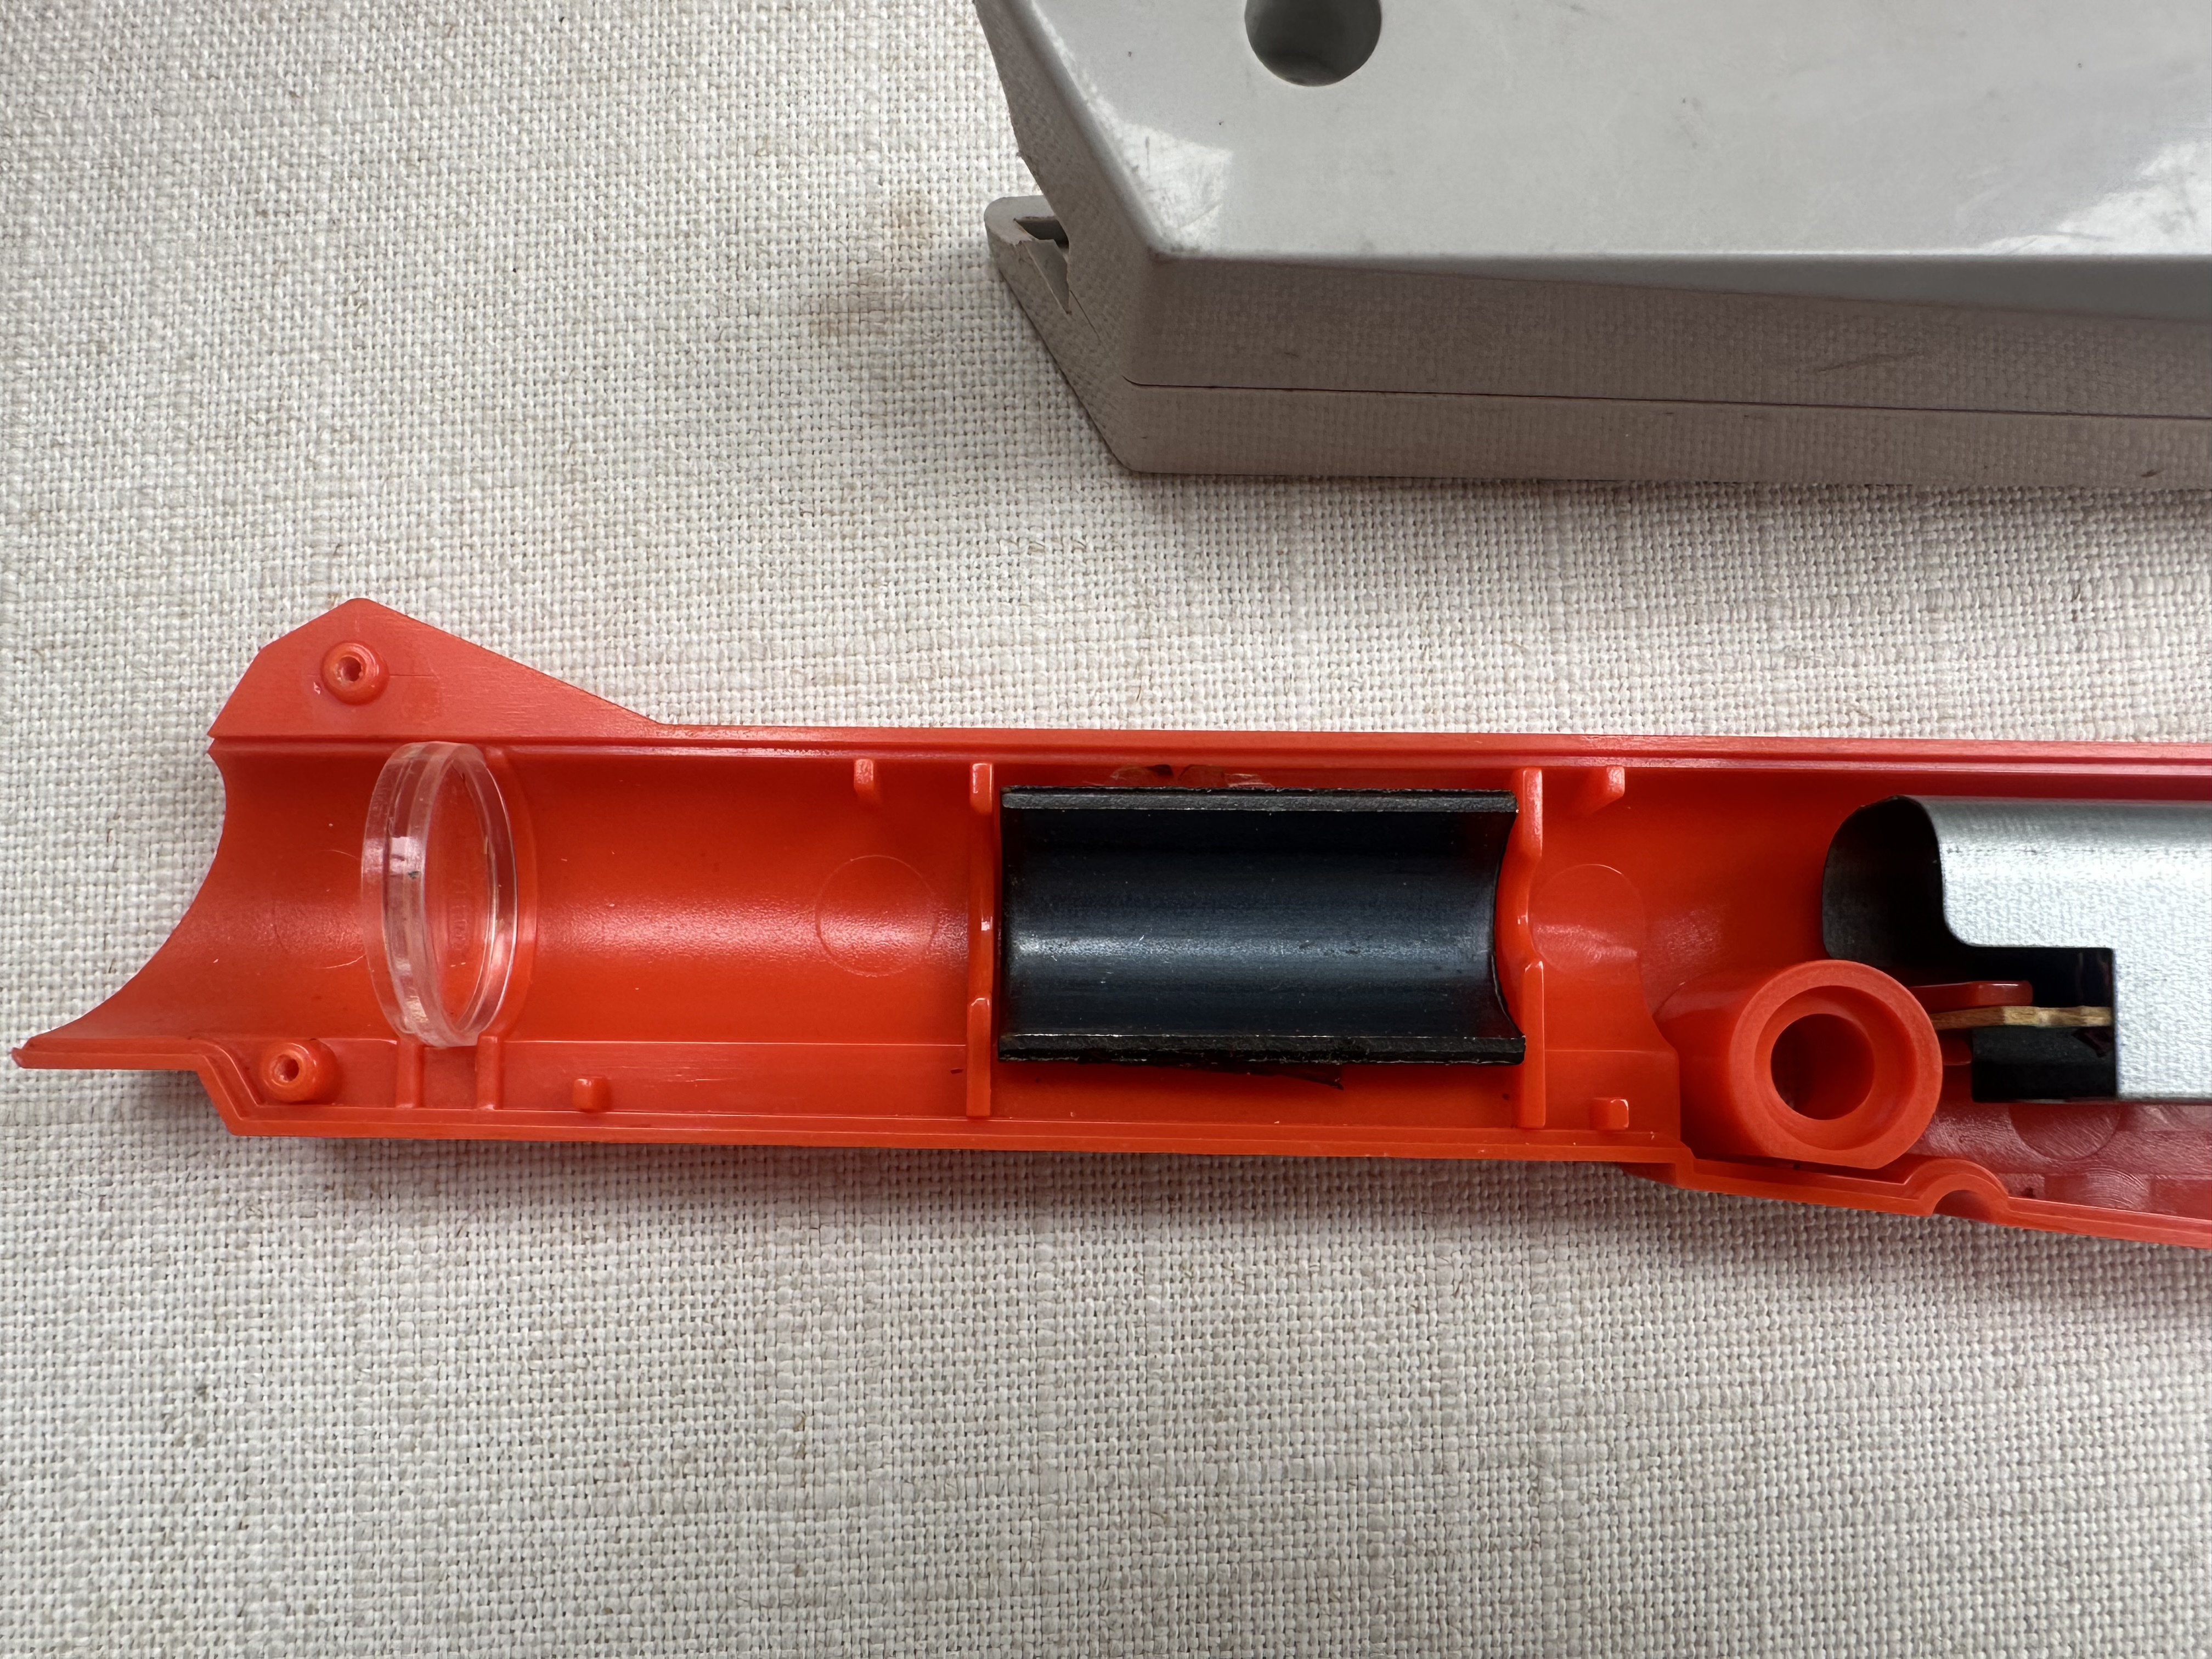
Once we get the side off we can see the main electronic components of the gun. I’ll break the gun down into a few discrete parts. The trigger module, the photodiode module, the barrel and the handle.
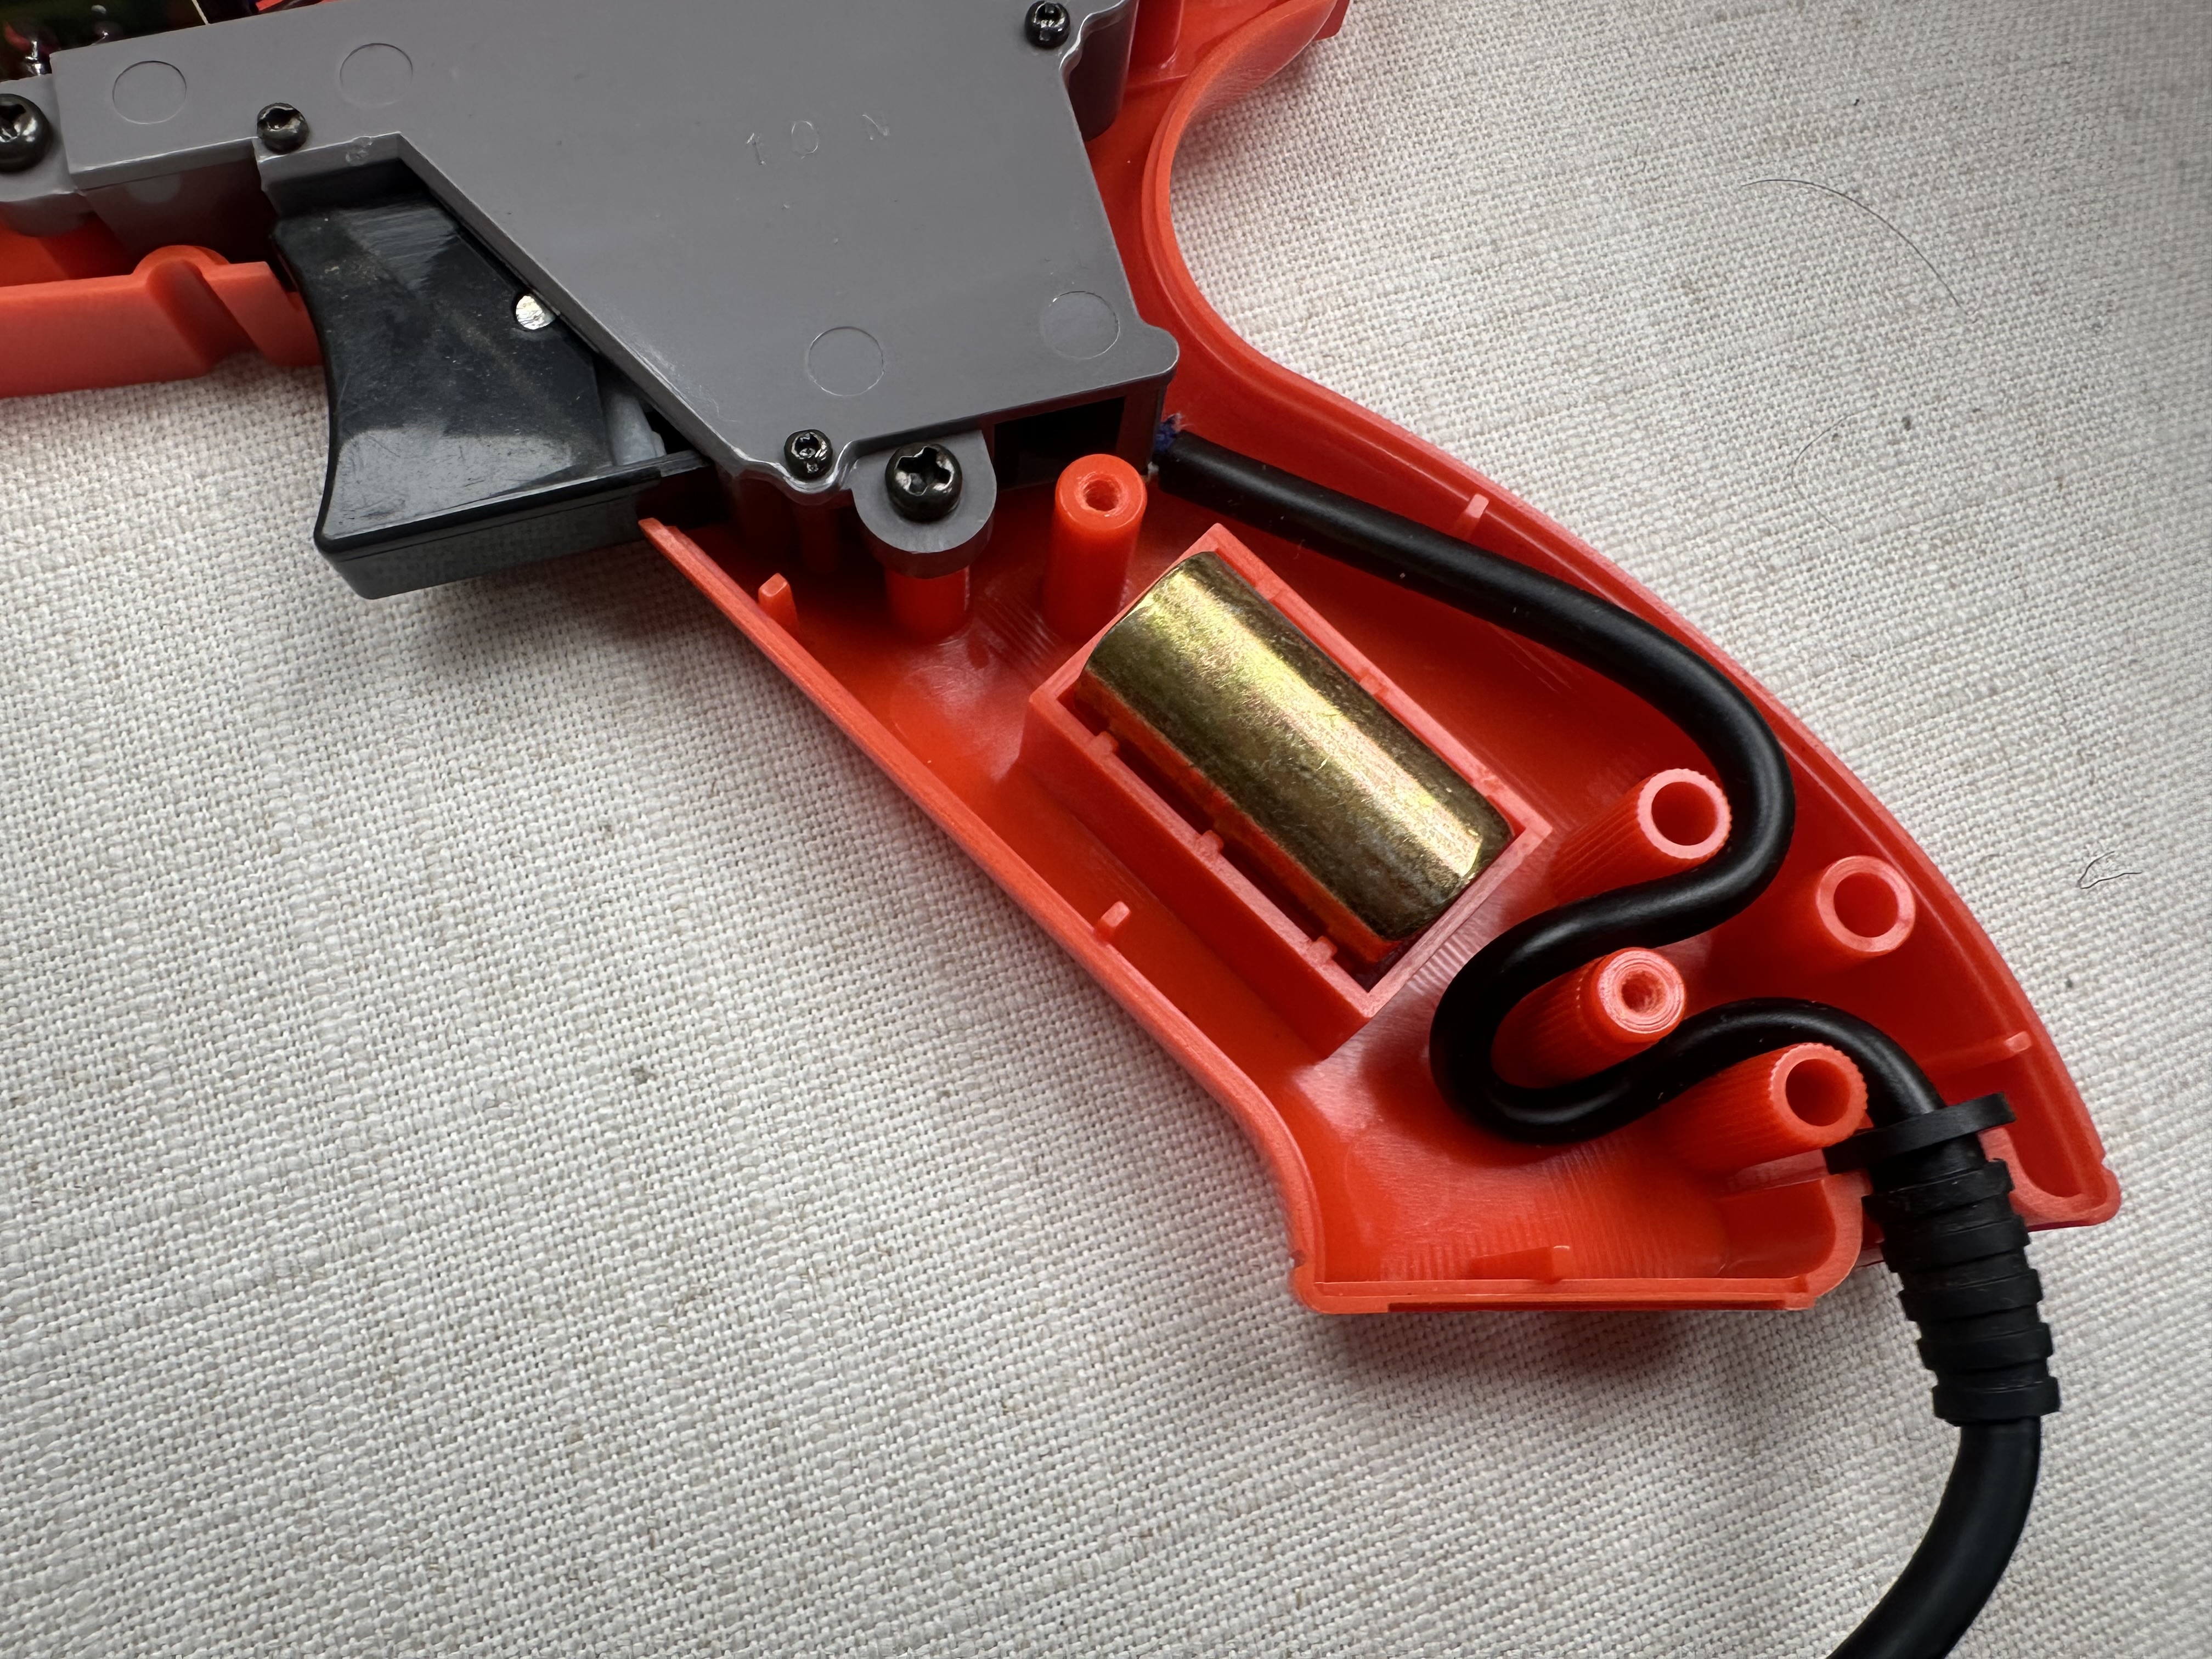
Starting from the least interesting section, the handle. Curiously the handle contains a brass weight that doesn’t appear to perform any function except making the gun feel a bit more interesting to hold. This weight plus the weight in the barrel section covered later gives the gun its realistic feeling.
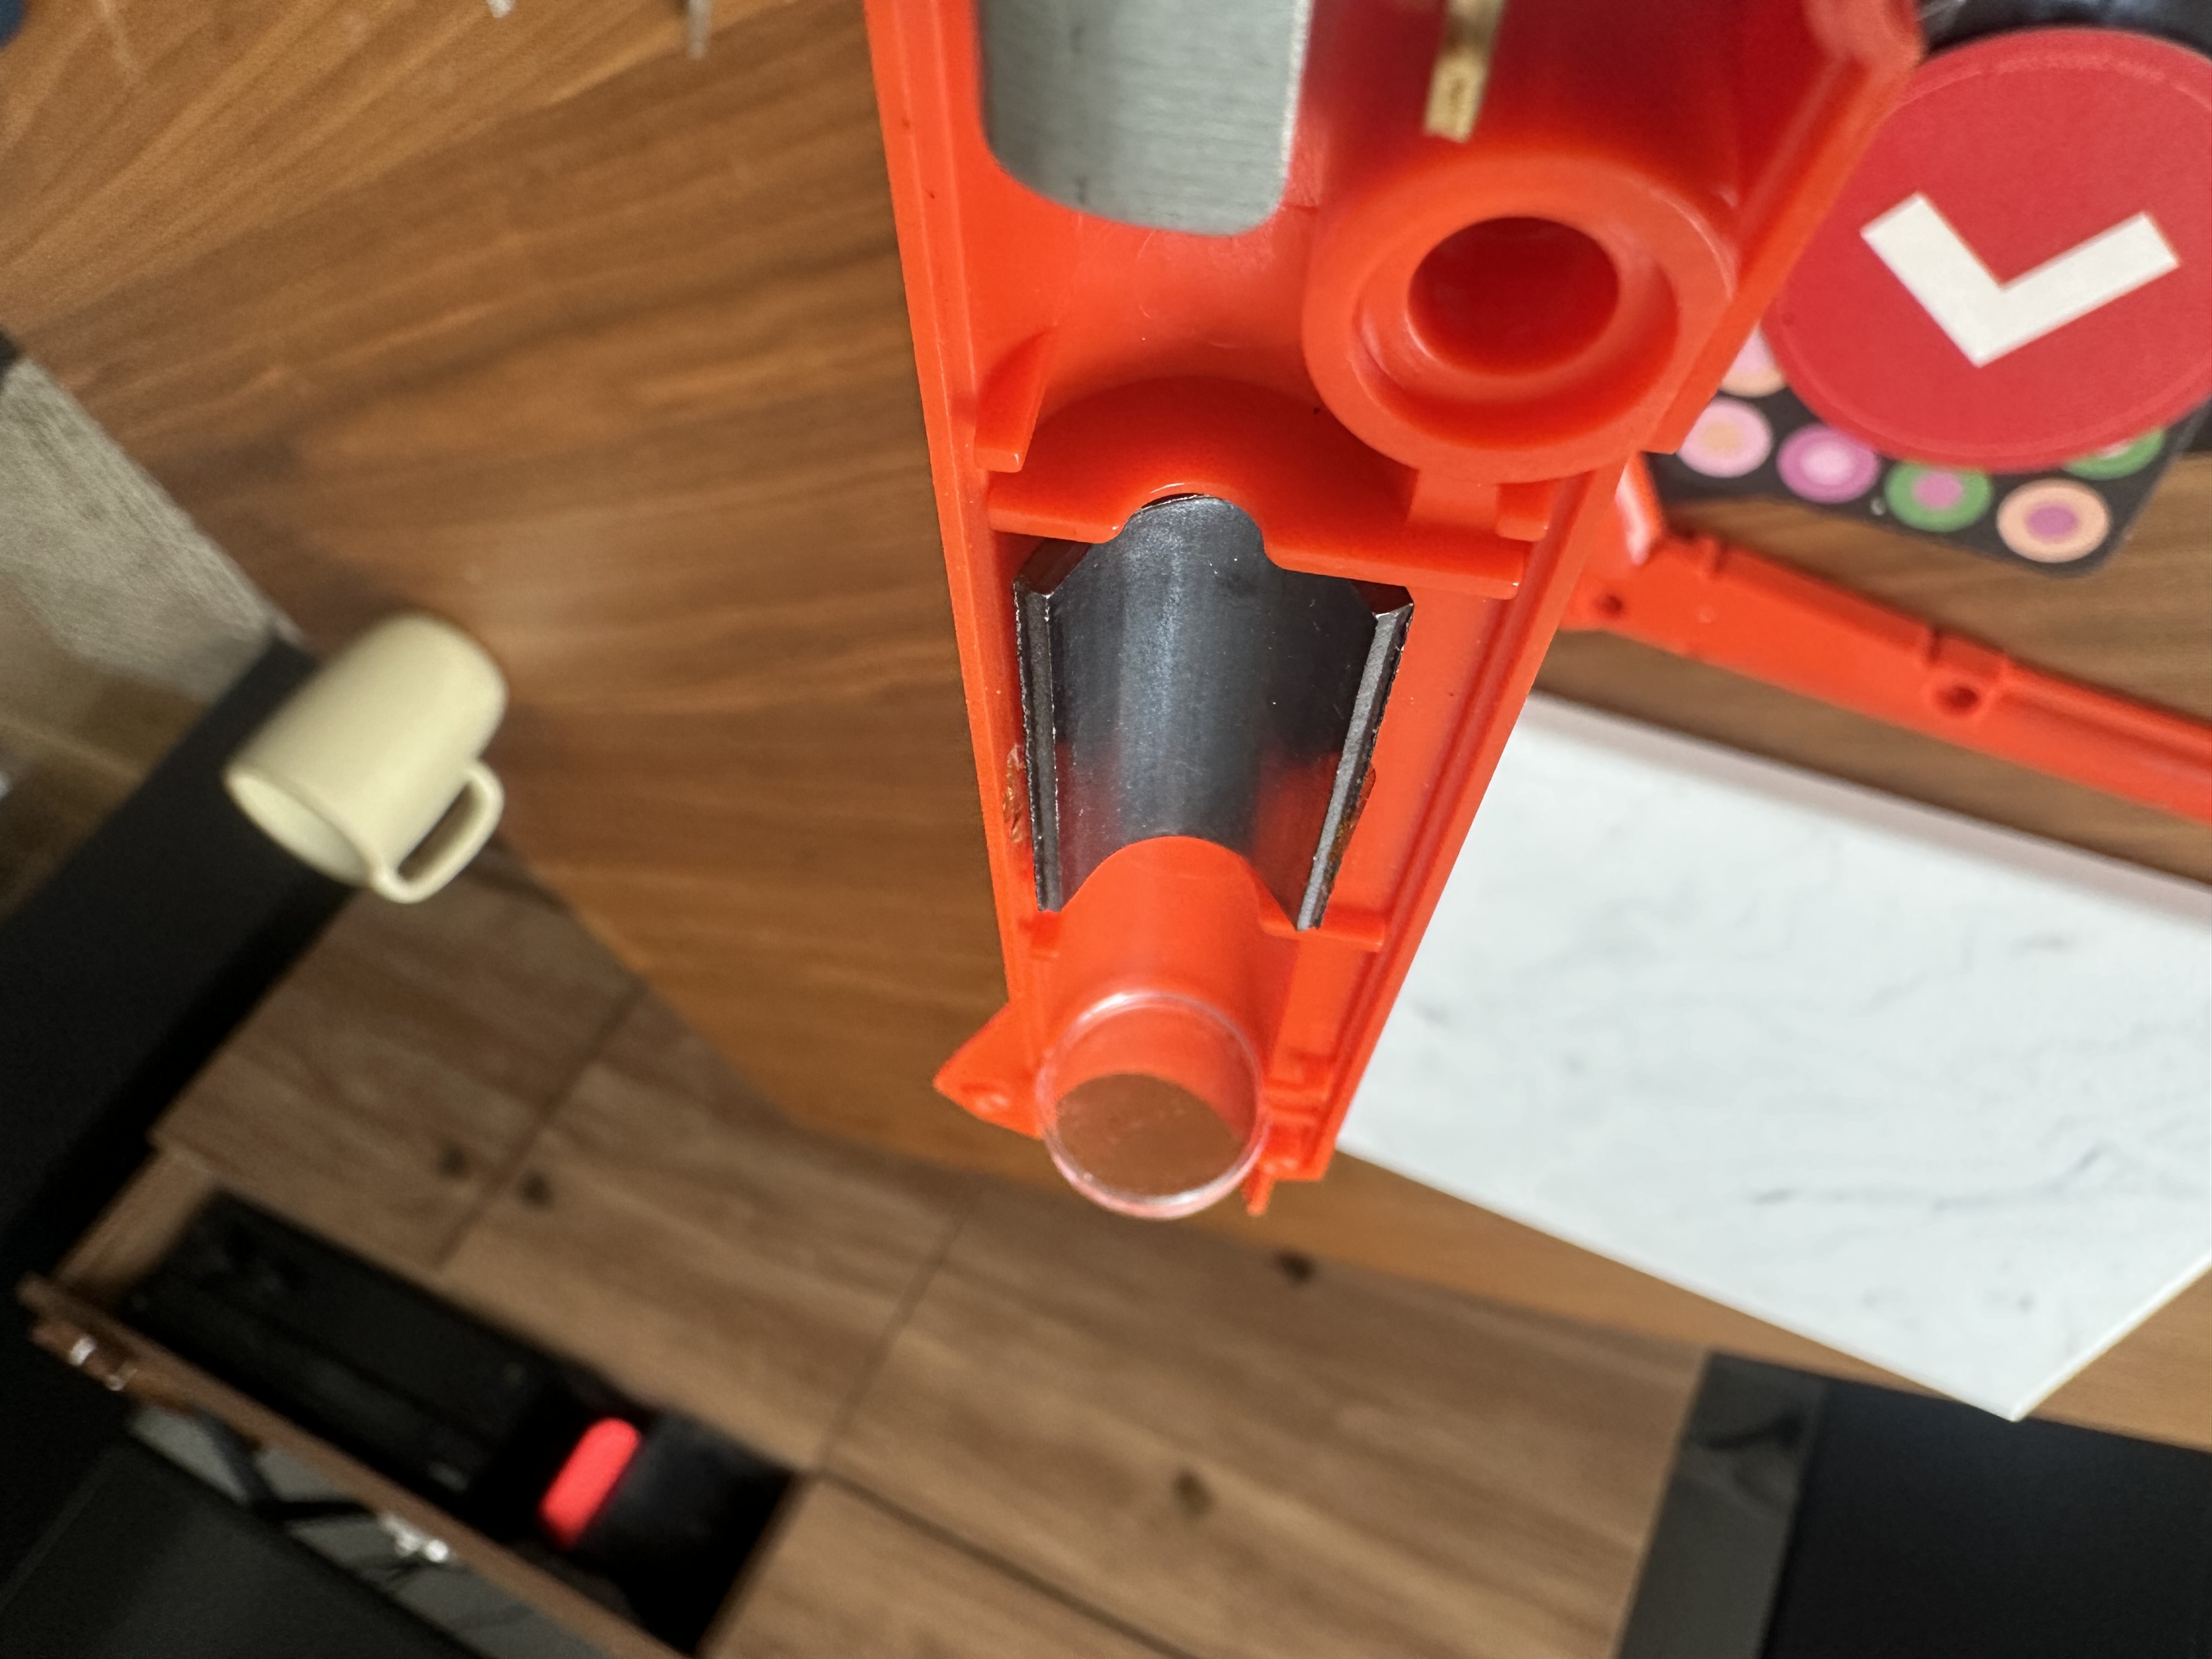
The barrel contains a few interesting components. On the left there is a lens, in the center there is what appears to just be a weight (It doesn’t seem to actually be in the field of view of the photodiode) and two orange occluding features that restrict the FOV of the photodiode. The one further back in the barrel (closer to the diode) is very small, likely this is optimized to the range of the gun, the smaller the barrel the further the range but the more sensitive the diode needs to be.
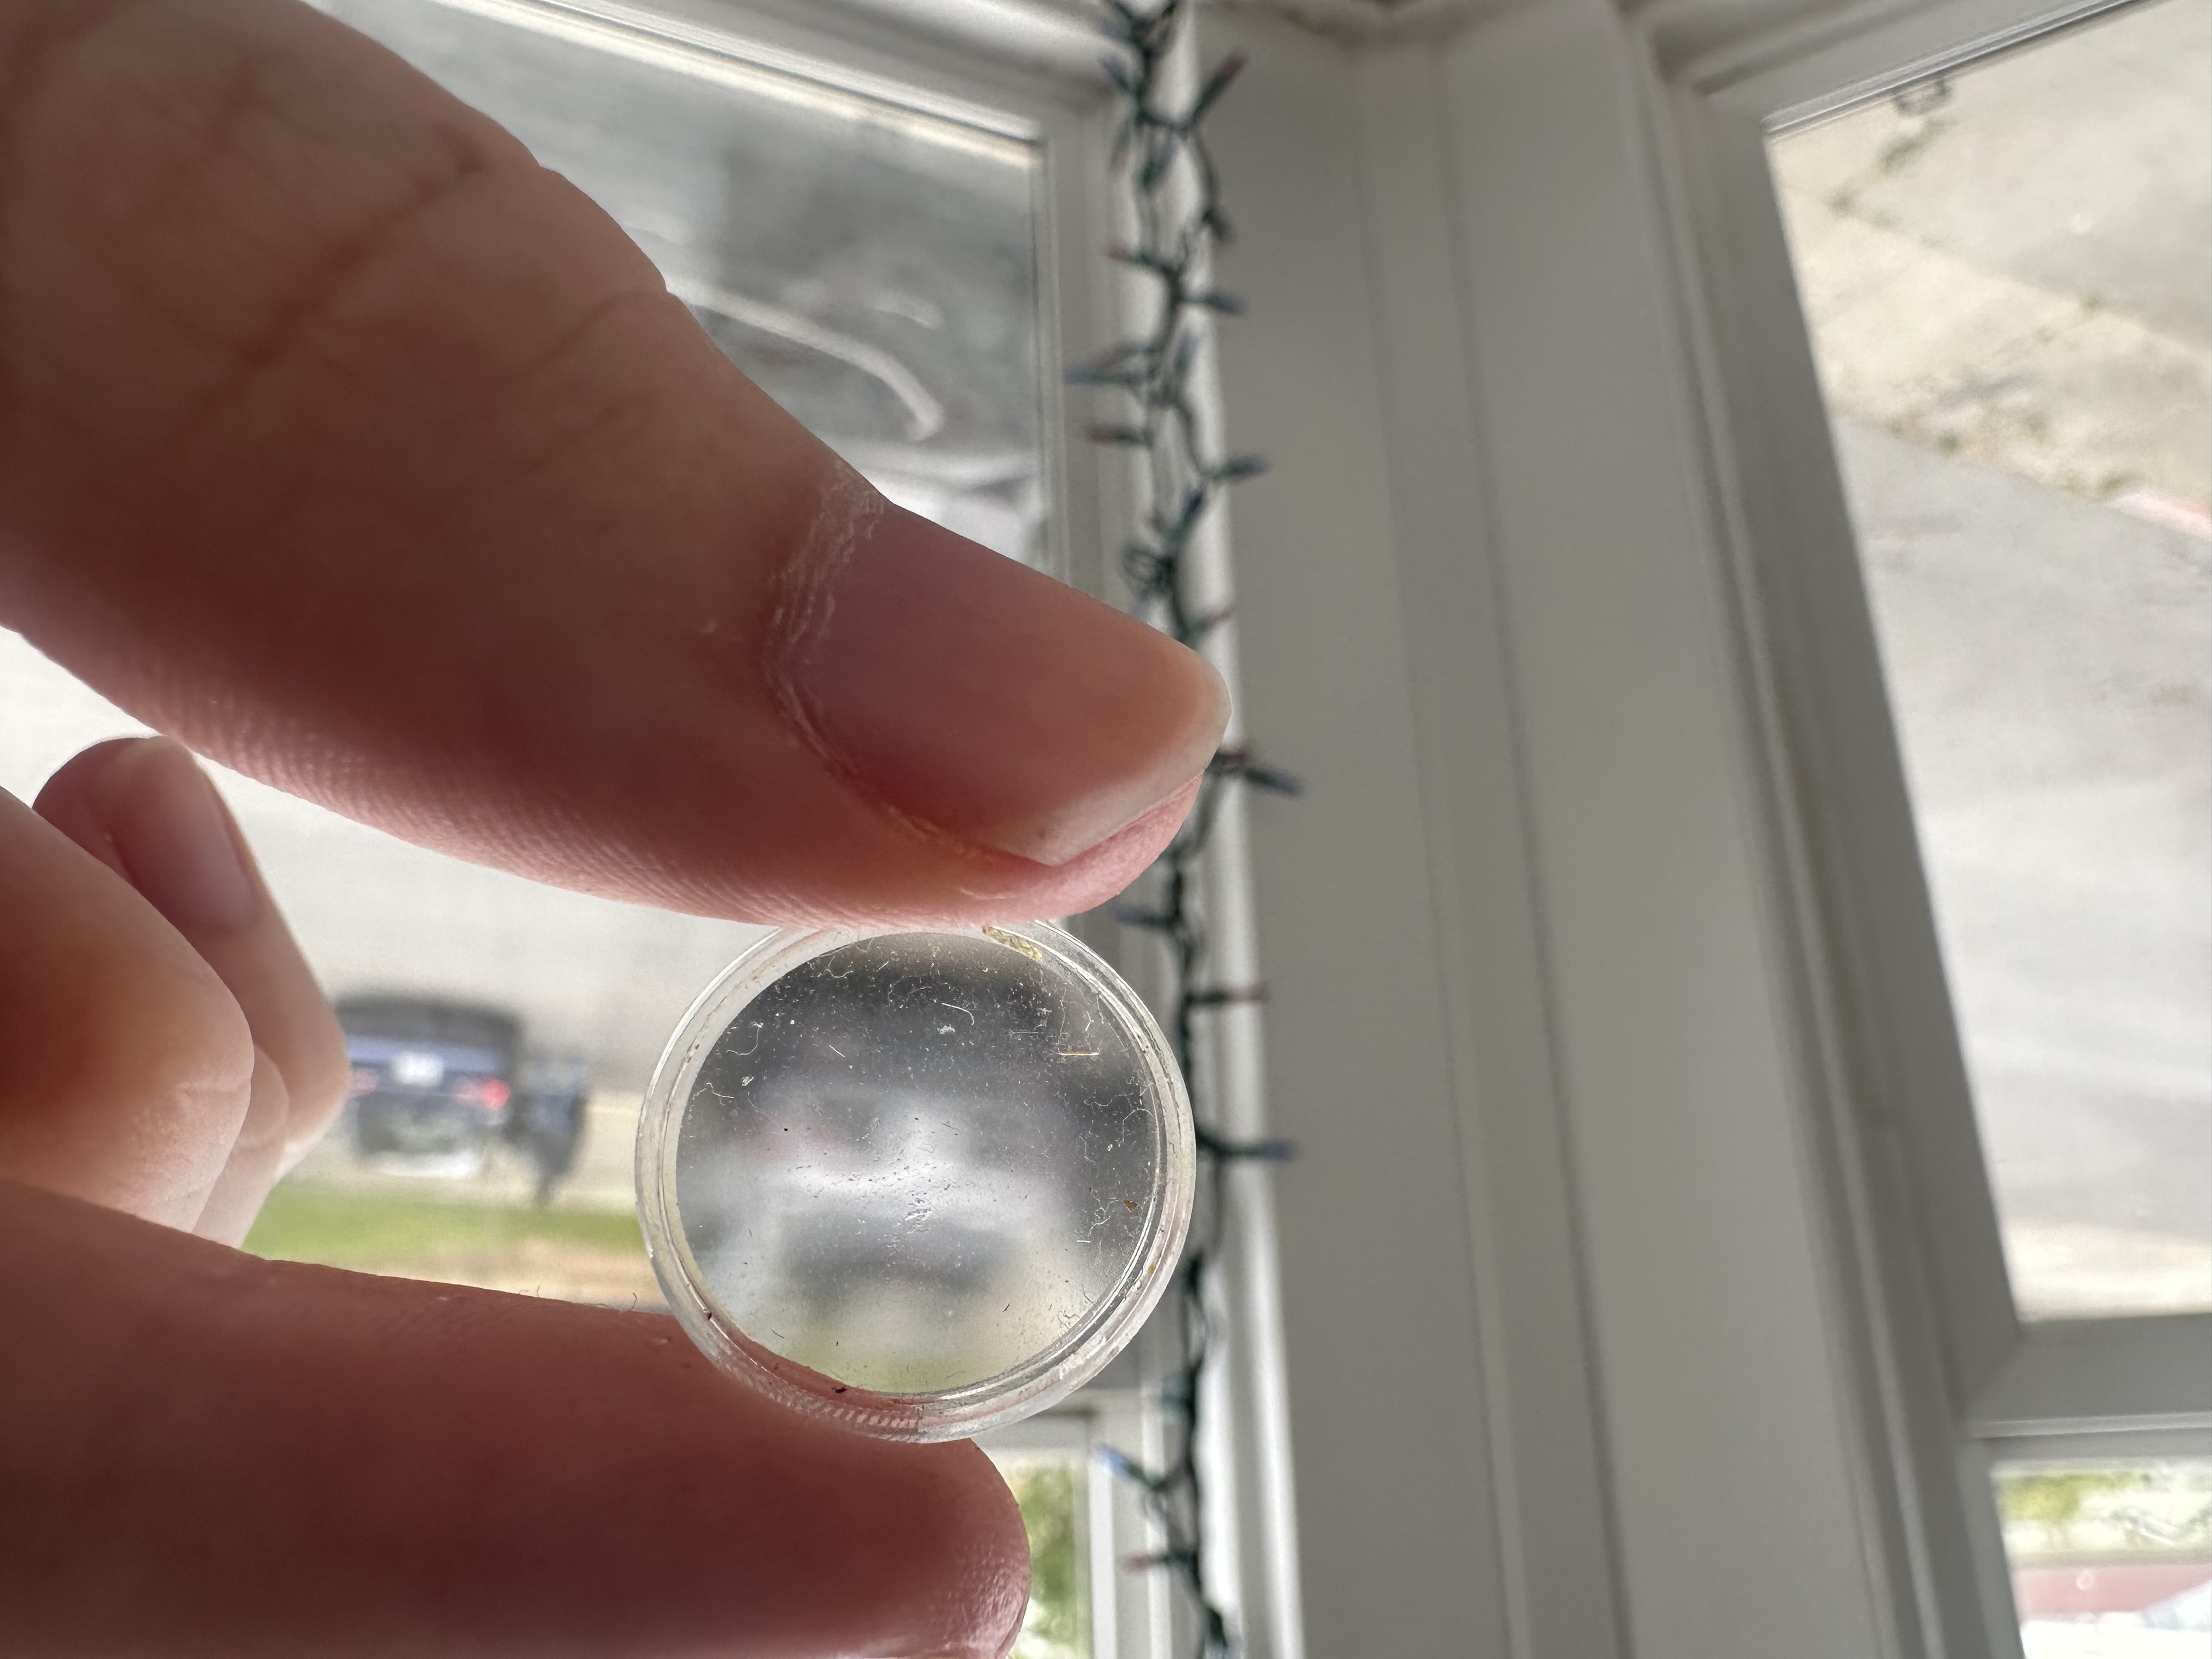
Best I can tell the lens doesn’t actually do any lensing, it seems to be just a light diffuser, likely designed to blend all light that the gun is pointing, acting as a sort of physical averager. I could be wrong, but I could not get the lens to focus at any distance from my eye, so I don’t believe it has any focussing properties.
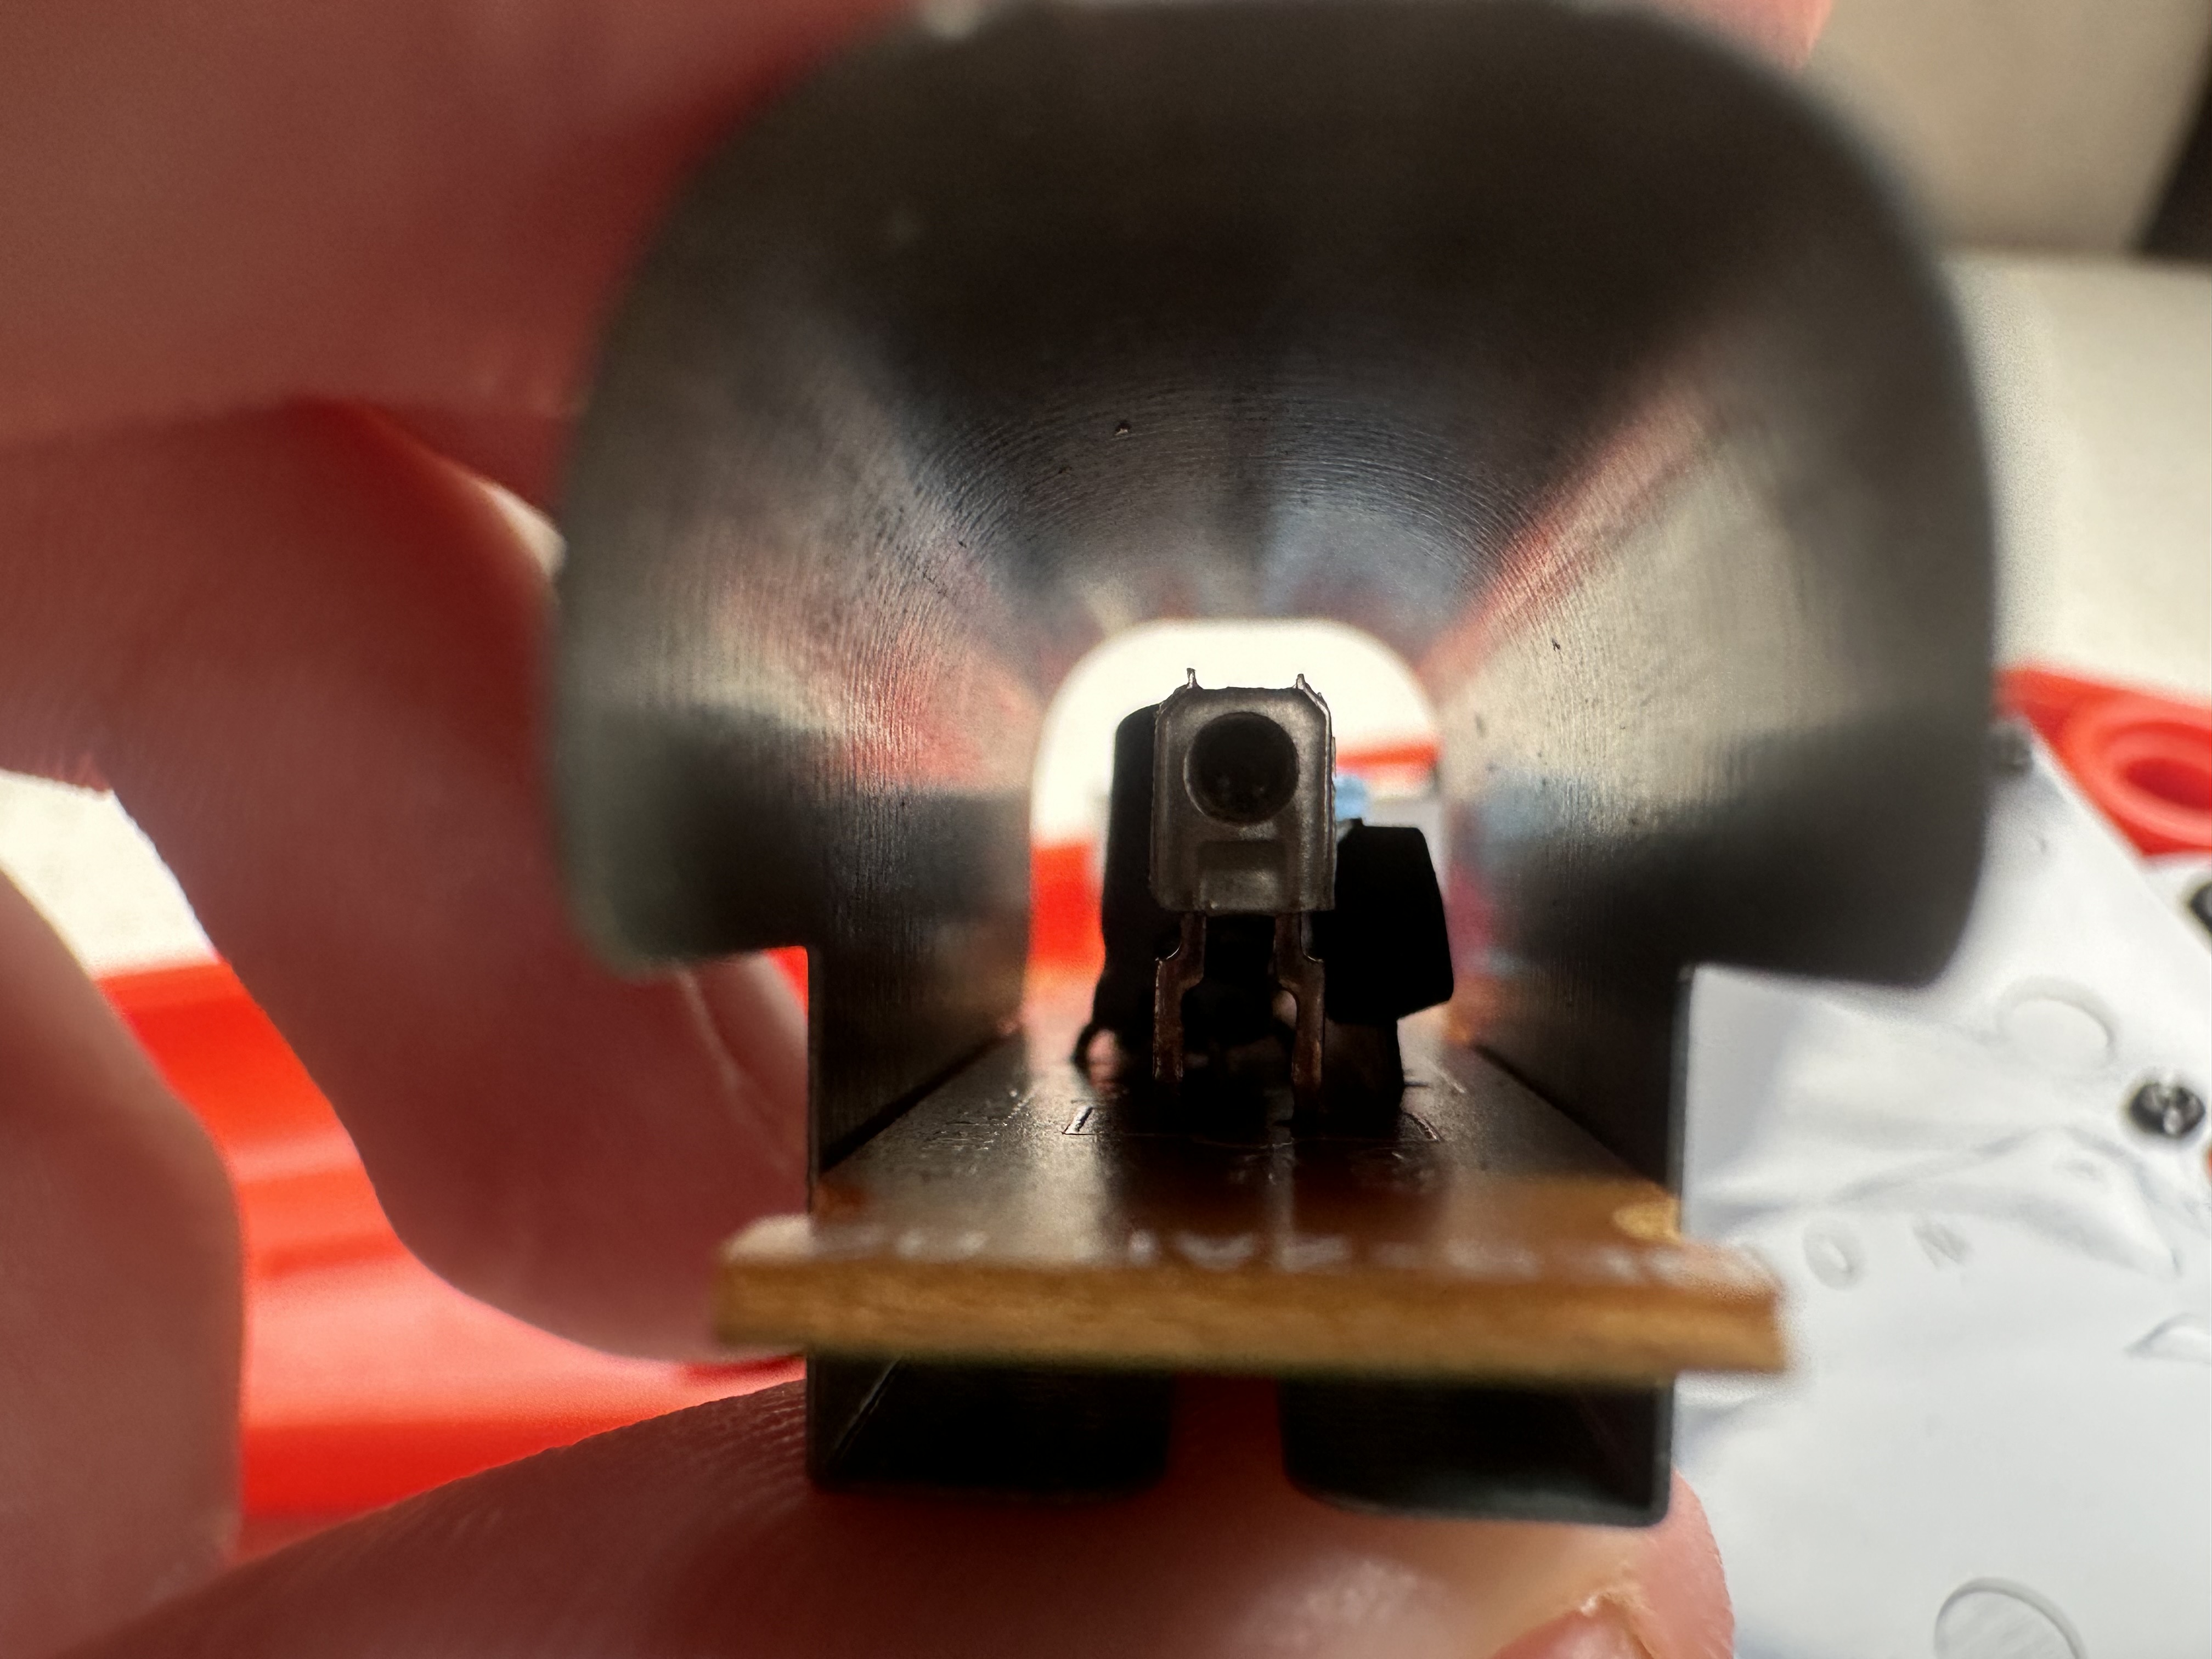
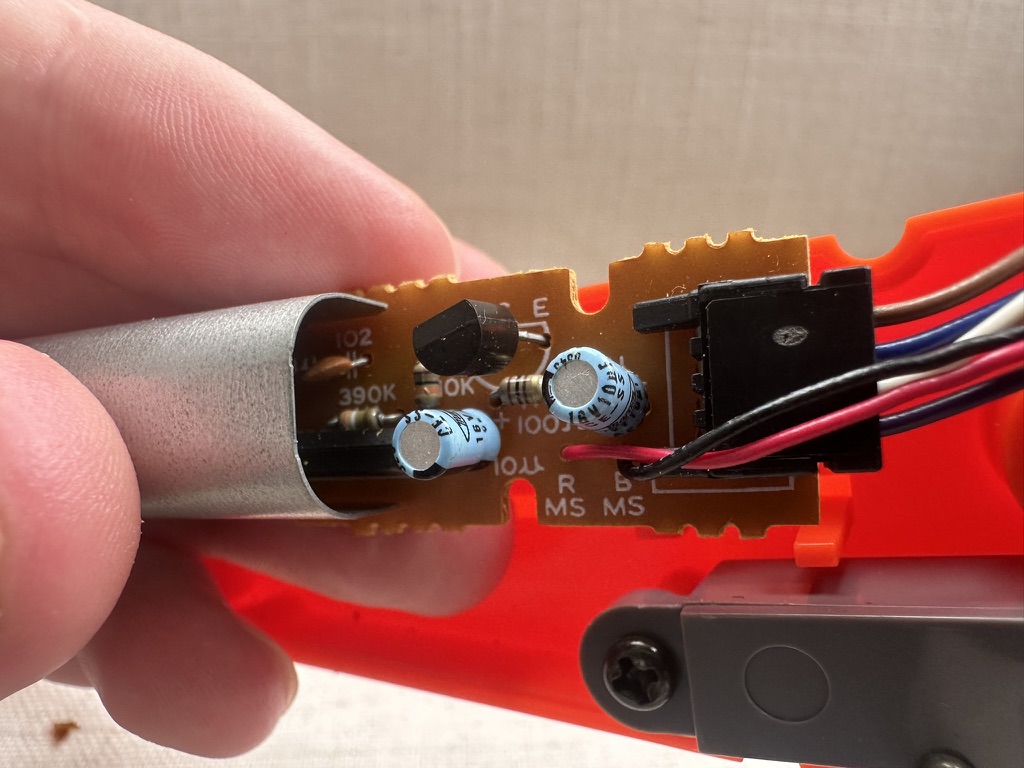
The final piece is the circuit board of the photodiode and controller output wires. The photodiode is shielded by this sheet metal piece (which makes it very frustrating to do any EE probing of the board) likely designed to block any ambient light that might bounce around the interior of the lightgun. The control board itself seems to have a simple amplifier for the photodiode, and some sort of IC (that I can’t see under the shield). Honestly it contains a surprisingly few number of components, and then appears to just output everything back along the controller wire to the NES.
I’ve already gushed quite a bit about how cool of an invention this gun is, but let me just say one more time how cool it is that something like this was built in 1984. I just absolutely love that this much work, creativity and ingenuity was put into building something that exists only to bring joy into 8 year old boys (and their father’s) hearts.
i miss you my leaf, but that’s okay, good luck